Hiveword Plus: Custom Fields
With Hiveword's custom fields you can extend the built-in types (e.g., story components such as characters, scenes, etc.) with fields of you own choosing. You can also create entirely new types to track anything such as Spaceships or Religions with the Custom Types feature. A custom type would be comprised entirely of custom fields, of course.
Extension Fields
You can augment the existing Hiveword types with your own fields. Let's add a Theme field to the story detail page:
- From the main menu, click Tools and then Types and Fields
- Click the "Built-in Type Extensions" tab ("Types" and "Story Components" are synonymous)
- Click Story since we want to add a Theme field to stories
- Click Add New Field
- For the Field Name, type "Theme"
- For Visual, select Textarea (you'll learn more about visuals in the next section)
- Click Save next to the field
You'll now see a preview of how your new field will be displayed. Please note that the fields in the preview are not "live" so don't enter any information there.
If a field needs describing, you can do so in the Description field. These descriptions can be turned on and off at any time. You can see how it looks by entering a field description and looking in the preview. The "Show descriptions" checkbox lets you toggle descriptions in the preview. When you are editing a story component that's been augmented with custom fields, that screen's Actions dropdown menu allows you to toggle descriptions.
Let's have a look at a story detail page now that you've added the Theme field:
- Click the Hiveword logo or Stories in the left sidebar
- Click on your story
- Behold! The Theme field appears at the top of the story detail page. Like the other fields on the screen, text you enter in the Theme box will be saved with the Save button as you'd expect.
Now, all of your stories will have a place for you to keep your theme information.
Field Visuals
In the previous section, Extension Fields, the entry for "Visual" was glossed over for the example. It's important to choose the appropriate visual for your field. The types of visual representations are:
- Textbox
- Textarea
- Checkbox
- Category
A textbox is a small field for entering a short bit of text. It's perfect for a name or a very short description such as capturing a color. This type of visual — while it can hold a lot of data — is not appropriate for a large amount of data. Moreover, the field itself is not expanded like a textarea.
A textarea is for a large amount of data and is expandable by clicking and dragging the button border/corner.
A checkbox is for true or false data.
Category is a special visual that is not a field at all. Have a look at this screenshot of custom fields:
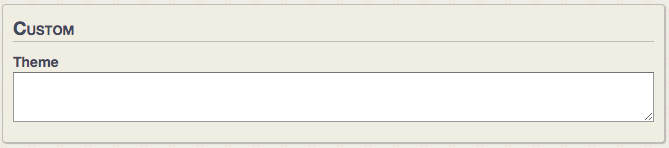
Notice that the fields are contained in a box with a thin border. The word "Custom" appears at the top by default to indicate that the contained fields are custom. If you want that word to be something else, you need a category visual. If you want multiple groupings (because it makes sense to group related fields together) then you also need categories.
Let's create a category "field" to change the grouping name from "Custom" to "Custom Fields are Cool!"
- If you are following along with the example from above, ensure that you are on the story extension fields screen
- Click the stacked circles icon () next to the word Theme (i.e., the name of the field you entered above)
- Select Add Field Before to add a field before Theme
- Type "Custom Fields are Cool!" in the Field Name box
- Select Category in the Visual dropdown
- Click the Save button next to the category field
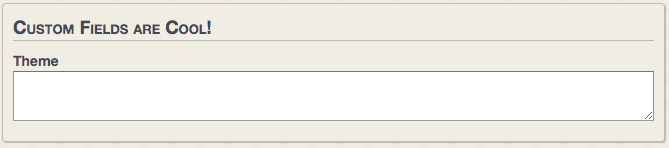
That's it! The preview section now shows your specified group name instead of "Custom."
By the way, adding a description to the category field effectively describes the entire grouping. Let's try it:
- Click the stacked circles icon () on your category field
- Select Edit
- Add some descriptive text
- Click Save on category field
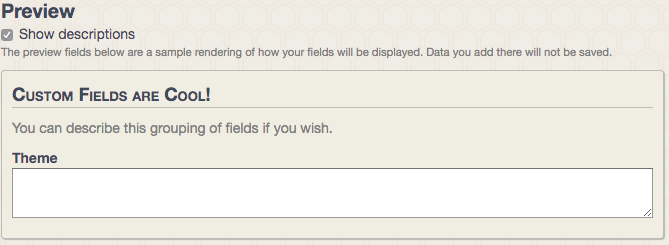
Notice that the description you just entered appears in the preview area (assuming you have "Show descriptions" checked).
The last thing to consider about groupings is that all fields will appear in a grouping until another category fields comes along. Then, all fields afterward will be in that grouping. This is how you get multiple groups.
Field Order
As implied in the previous paragraph, field order matters. Primarily, fields will be displayed in the order in which they occur. This is especially important if you want to do groupings as discussed in the previous section.
You can certainly enter the fields in the correct order in the first place, but what if you need to adjust things? It's easy: just drag and drop a field row to the correct position. Changes are auto-saved and the fields will appear in the new order everywhere.
Let's run a little experiment. If you've followed along above then you have a category field followed by a field for Theme. What do you think will happen if we switch their positions?
- Ensure that you are on the story extension fields screen
- Drag and drop the category field after the Theme field
Observe what happened in the preview. Theme is now in the default "Custom" grouping and the grouping you created comes after the Theme field but has no fields in it.
This is just how it should be. "Custom" is back because there is no grouping specified by the user before the Theme field. Then, after the Theme field, a new grouping starts but there happens to be no fields after it to include in the group. This latter behavior, by the way, is exploitable in that you can have a fieldless grouping with a description. The result is a "group" that is just text which can be anything you need it to be.
Extra credit: What do you think would happen if you placed two categories in a row like this:
Category 1
Category 2
Adding Fields
You can add new fields at any time. The new fields will appear on every detail screen for the type.
Editing Fields
You can edit a field by clicking on the three dots menu and choosing Edit. You can then modify the field name, visual representation, and description.
Deleting Fields
You can delete a field at any time by clicking its stacked circles icon () and choosing Delete. However, doing so will not only remove the field definition but any data you've entered in that field everywhere.
For example, in the example on this page above, you added a Theme field to stories. If you entered data in those theme fields in three stories, ALL of the the data will be deleted when you delete the Theme field definition.
Deleting a field deletes any associated data, anywhere.
Because deleting custom fields is such a nuclear option, Hiveword takes steps to prevent inadvertent deletion.
Field Usages
The first thing you'll likely notice is the number of field usages. See the screenshot:
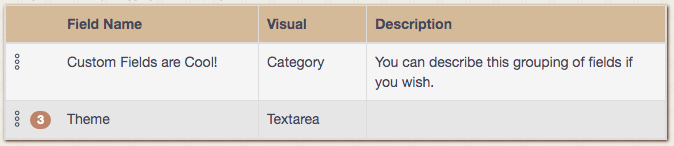
The pills show the number of times a field is in use (meaning, having data). If the number is two, for example, this means that there are two places where that field has data. The screenshot above indicates three usages.
Deletion Confirmation Popup
When you click the Delete button you'll get a confirmation popup that warns you if the field is in use anywhere. If you follow through and delete the custom field definition, the field and all of its associated data will be will be permanently deleted.